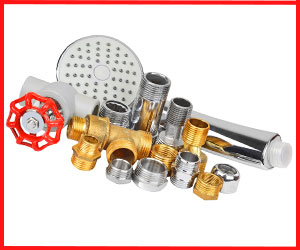
On average, an American family consumes 17% of the total water for bathing or showering, as per reports by The United States Environmental Protection Agency.
Flow restrictors are just another name for water restrictors. They are specially designed to decrease the water flow as you bathe in your bathrooms. But if you are not interested in the low flow then how to remove flow restrictor from delta shower head?
To resolve this dilemma, a law had passed back in 1992 by the United States of America under the Energy Policy Act.
It’s stated that a flow restrictor needs to be installed in all shower heads.
The law does not permit the consumption of any quantity above 2.5 gallons of water each minute.
This measure would not only help in conserving water but is an environmentally friendly remedy to a destructive issue.
On the other hand, this can often lead to excessive water flow reduction, leaving behind no water for bathing.
In the case of, you may need a detailed guide on how to remove flow restrictor from Delta shower head to get you through this tough time, and that is exactly what we are going to talk about in this article.
Not only will there be a thorough guide for your dilemma, but we will also enlighten you on how to adjust water pressure on delta shower head; this means no more low water pressures.
How to Remove Flow Restrictor from Delta Shower Head?
Delta shower head flow restrictor replacement is quite a simple process that takes only 15 minutes and does not require any professional help. Now, you need to grab your plumbing tools and get going.
But before let us look at the set of tools required to remove flow restrictor handheld shower head.
The following set of tools and materials are required to remove a flow restrictor from the Delta showerhead and faucet.
Make sure to get your hand on these before you start the process.
Tools & Material
- Needle-nose pliers
- An adjustable wrench
- Teflon plumbers tape
- Brush
- Paper clip
- Towel
Delta Shower Head Disassembly Step-byStep Procedure
Below is a step-by-step shower head manual for disassembling it, so that you face no issues while doing so and can restore your water flow with ease.
Step 1:
Use a fiber cloth or opt for a rag to wrap around the connector or the pipe. A rag comprises scratch-resistant properties.
Step 2:
Check the connection in your best handheld shower head. Remove any protector or nuts if present. Usually, a shower screen is attached to a Delta showerhead.
In case you have this particular model, then firmly remove it. Make sure to read up on the manual guide before moving on.
Step 3:
Separate your shower panel from the best shower head 2021 and disconnect the hose tube, if present.
Unscrew the showerhead using an adjustable wrench while keeping the wrapped cloth in place using a second wrench.
It will prevent water drop leakage in your washroom. You can also place a bowl underneath to prevent your bathroom floor from getting wet.
Step 4:
Have a more in-depth look within your showerhead to locate the black O ring or the gasket. It may be challenging to find it, as it’s not quite visible.
Once located, unbend a paper clip and use it to remove the black O ring. Once done, next, you can identify the pulse shower head flow restrictor inside.
Step 5:
Now remove the black O ring. You will find the restrictor beside it with a plastic disk appearance. It is usually located behind a star-shaped metal-like object.
It is brighter in color than the shower panel – an easy way to identify the flow restrictor. If not, find any similar item that is blocking the flow.
Next, use a paperclip or a needle nose plier on the restrictor while twisting it. You can now successfully remove the delta shower head flow restrictor.
Caution: Be careful while performing this step. If you have any doubts, then have a look at the manufacturer’s manual guideline. In case you displaced the manual, a copy of it is available on their website, so have a look.
Step 6:
Clean your showerhead if it’s an old one. This will directly increase your water pressure flow in the showerhead. This is an optional step but highly recommended.
Step 7:
From the hose, remove any old Teflon tapings and use a new one instead of wrapping to keep the showerhead intact.
Step 8:
You now have to insert back the black O ring inside the showerhead. Use a thumb for sitting it in place firmly, so it fits well.
Step 9:
You can now place the screen on the showerhead again.
Step 10:
Use your hand in a clockwise direction for the screwing of Delta. An adjustable wrench can also be used instead.
However, refrain from exerting excessive pressure; otherwise, it can cause damage to your showerhead. A channel wrench can be used instead of the tightening of the head.
Step 11:
The final test includes the performance checking of your shower head.
Turn off all other devices at your home before you test the water flow so that no water is consumed.
Shut down the main valve and turn on its full speed to get the maximum water flow speed.
Now turn on the shower and test its highest speed for a reasonable water flow rate.
Caution: Read up on the manual if you incur a problem like a delta shower head pause button stuck.
Step 12:
You can reuse the restrictor valve. Hence keep it safe. In that case, you have not need to buy a new one.
Precautions
- Removal of the water flow restrictor from your delta shower head can result in increased water utility bills.
- The black O ring needs to be removed with additional care.
- In case you are unable to perform this task, seek professional help immediately rather than damaging your product.
Conclusion
Shower head restrictors are installed solely to reduce water bills and to save large amounts of water.
However, it often leads to problems like low water pressure, even in the best high pressure shower heads.
Hopefully, this guide about how to remove flow restrictor from delta shower head must have solved your secondary problem.
This guide is quite useful for most kinds of Delta shower heads available in the market—hoping that you can now fix your showerheads and save the day!


Leave a Reply